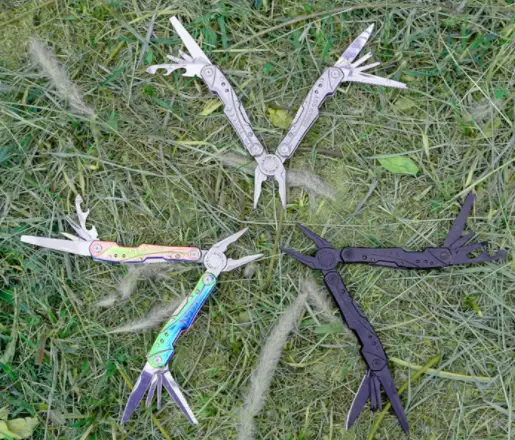
Carrying a multi-tool is a tremendous responsibility. Especially for those younger campers and outdoors people. I remember receiving my first multi-tool and pocket knife. It was a momentous occasion that I was allowed to keep and maintain my own. What I hadn’t realized at the time was that much like a pet, a multi-tool requires upkeep and maintenance. If we want to stay prepared with a functioning tool in the outdoors then we need to do some indoor upkeep! That is why I felt it so important to create this expert guide to multi-tool care and maintenance. Remember an ounce of prevention is worth a pound of care.
Already an expert on maintaining a multi-tool? Check out these multi-tool options for under $25!
The Importance of Maintenance
Why should we even do maintenance on such a small hand tool? The first part of the expert guide in multi-tool care is to know why we do that maintenance. You may think that it is not really worth the effort. However, the more you expand your multi-tool horizons the more expensive they get. So you are protecting your investment. Not to mention there is something a little more special about a handed-down tool from parent to child.
Most modern multi-tools will use some form of stainless steel in manufacturing. There is a common misconception that that stainless steel cannot rust. That is really not the case as it is capable of resisting but not preventing rust or corrosion.
So we need to make sure that the individual tools are cleaned and sharpened to ensure that they have a long life. Beyond just the tools there are mechanisms that allow each one to swing out or stay in the locked position. If foreign material is allowed to enter and remain in those parts it is likely the tool will not provide the functionality that you desire. So maintenance will help to facilitate the easy use of the tool.

Expert Multi-Tool Care Frequency
Once you realize the sheer versatility a multi-tool can bring to your camping experience you are going to be using it all of the time. Each time that you pull it out of your pocket or exercise the pivot points you are decreasing the life of the tool. However, by doing regular maintenance on each component you can actually add life back to the tool and that is where this expert guide to multi-tool care is going to help.
So how often are we going to apply expert multi-tool care? My personal preference is at the completion of every camping trip. I put this into my tear-down regimen as soon as I return home. I do not mind camping in extreme weather or allowing my multi-tool to get wet. Because of this, it is important to perform maintenance more frequently.
In general, though, providing care at the start of the camping season and the end of the season should be enough to keep your tool in working condition. However, if you choose, like me, to use your multi-tool outside of camping activities, then it may be beneficial to keep up on the maintenance at least quarterly throughout the year!
Steps for Expert Multi-Tool Care
There are considered to be three steps in the expert guide to multi-tool care process. I am going to walk you through each of these steps and provide you with some recommended products that can make this process easier. As stated in the sidebar some of the links to these products may earn me an affiliate commission at no additional cost to you. However, these are products that I have used and trust. Now back to the important task of cleaning our multi-tool. Use the PCP Process in these three steps:
- Properly clean the tool
- Completely dry the tool
- Protect the tool
Properly Clean the tool
There is a multitude of ways that you can clean a tool. How in-depth of a clean you conduct is also dependent on use. If you are using your multi-tool only as part of infrequent camping trips then you may get away with doing a light cleaning. However, if you decide to use that tool every day of the week then you will want to do a deeper clean. If your tool has come in contact with the elements, dirt, grease, and other natural detritus in the outdoors, then you are going to want to do a deeper clean when your trip is over.
A light cleaning – A light cleaning could include simply using an air can duster to blow loose material off of the tool. This is the lightest cleaning possible and will ensure that the mechanisms are free of anything that could cause damage. Depending on how stuck on some of the material is you may want to pull out some q-tips to get into those harder-to-reach places. The goal is just to remove the surface dirt.
A moderate cleaning – With this type of cleaning you will want to combine the light cleaning dust off with some more vigorous washing. Use standard dish soap to break down any of the stuck-on items. and clean out the dirt from the mechanisms. The pivot area is of most concern.
A heavy cleaning – If you run across what seems like baked-on gunk then it is time to go heavy-duty. Contaminants like tar and sap can bind pivot points and prevent proper tool use. You especially do not want these to get into the safety mechanisms. So for this, you will want to pull out a small hard bristled brush, or toothbrush. If the dish soap isn’t cutting through it then it is okay to use a mineral spirit to help cut through the grime. Just remember not to use chlorine bleach or other harsh chemicals on your multi-tool!
Completely Dry the Tool

Okay, here is the sad news. If you had to complete a moderate or heavy cleaning then it is likely you removed the protective coating on the steel. This oil film would have helped prevent rust, but now it is gone and you hold in your hand a wet tool. You have to remove this water and simply allowing it to air dry is not an option.
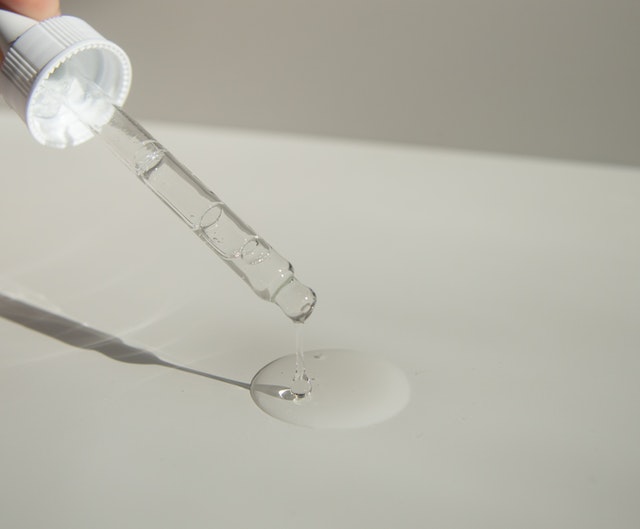
That canned air is going to come in handy again. You can use the air to blow the water out of any of the crevices a towel cannot reach. You will likely still have some water in hard-to-reach places. The best solution to this is to flush out leftover water with a lubricant and the most recommended is mineral oil. This is because the tool can continue to be used for food preparation if mineral oil has been applied. If this isn’t of concern then a quick shot of WD-40 or CRC 3-36 will work also.
Always check and follow the manufacturer’s recommendations on the type of lubricant to use.
In any case, getting all of the water off is important to the long-term functionality of your tool.
Protect the Tool
The last step in the expert guide to multi-tool care is protection. Final tool protection after the clean and dry is just important. I personally like to allow my tool to soak in mineral oil for a few minutes. I then take the tool out and use a clean microfiber cloth to wipe it down. This soak allows the mineral oil to penetrate into the crevices and pores of the tool. All-over protection is key to ensure that the tool lasts as intended.
Over time my clean towel will become saturated with mineral oil. Sometimes I will use this towel as part of a light cleaning to gently add some mineral oil coating back onto the tool prior to its next washing. This doesn’t provide a lot in the way of protection but psychologically I feel like my multi-tool is in better condition. This makes me want to show it off a little more to my camping partners!
Expert Multi-Tool Care Blade Sharpening
There are other things that can be done to extend the life of your tool that are not necessarily preventative in nature or fall within the expert guide to multi-tool care. However, they should be done somewhat regularly such as blade sharpening. There is not a single knife in the world that is going to remain sharp forever. If you are going to have a handy tool then you need to know how to keep it functional. Trust me there is nothing worse than being out on the trail with a dull knife. It will demoralize you as you try and complete simple tasks with what amounts to a butter knife. Luckily you have a couple of options! You could use a whetstone to sharpen your knife. These are a little more difficult to use and do take some practice to get angles correct. Or if you are like me, be a bit lazier and pull out a v-block sharpener!
Which method do you prefer? Tell us your sharpening stories on Twitter, Facebook, or Reddit.
Wet Stone Method

Practice makes better and over a long time perfect. Follow these steps using an old knife for practice before you plan on sharpening your favorite tool.
- Saturate the whetstone with water by soaking for 5-10 minutes. (This is a debated step. Some like it dry. Some like it lubricated. If you are unsure start with the manufacturers recommendation)
- Position the whetstone with the coarse side up on your provide sharpening block or on a mat or towel. You want to prevent sliding around as you sharpen.
- Position the knife on the stone at a twenty degree angle.
- Apply downward pressure and push it forward along the stone in a diagonal motion. The tip of the knife should be just touching the stone’s end.
- Pull the knife back without pressure but at the same angle.
- Repeat for ten to twenty strokes.
- Flip the knife over and repeat on the other side.
- Now flip the whetstone over to the fine grit.
- Repeat Steps 4 – 7 again on the fine grit to remove any burrs on the blade’s edge.
- Check the blade for nicks or dull spots and repeat coarse sharpening as necessary.
- Protect the blade with a coating of mineral oil.
V-Block Method

This method is a little more straightforward. Most v-block sharpeners have the correct angle for sharpening the knife built into the block. As in the image above some even provide you the ability to set the angle for different knives and have a V for both coarse and fine grit. So this tool could benefit your multi-tool and kitchen knives. We all love tools that pull double duty!
- Setup the block per the manufacturers directions.
- If angles are adjustable set the angle to the proper cutting edge for your knife.
- Hold the knife straight up and down and resting againts the bottom of the V in the coarse grit setting.
- Pull the blade back and forth through the V for 10 – 20 strokes applying slight downward pressure.
- Move to the fine grit V and repeat.
- Check the blade for nicks or dull spots and repeat coarse sharpening as necessary.
- Protect the blade with a coating of mineral oil.
Expert Multi-Tool Care – The Evil Rust Attacks
As mentioned above, just because a tool is made of stainless steel doesn’t mean that it is rust-proof. In fact, it just means that it is rust-resistant. That is why it is so important to keep our multi-tools clean and dry. Before you do anything you will need to determine whether the rust is surface or has penetrated into the tool. In many cases, it may not be worth the cost to have the blade repaired if you have rust that has penetrated into the tool. Check the manufacturer’s warranty and see if they will cover this type of rust and they may be able to make some repairs/corrections for you.
If it is surface rust and you would like to take care of it yourself then below there are a few things that you could try. I do not recommend taking your knife apart as this will likely void your warranty.
- Fully clean your tool following the advice above.
- Soak the tool in a quality rust penetrant like WD-40 or a 3 in 1 CLP for five minutes.
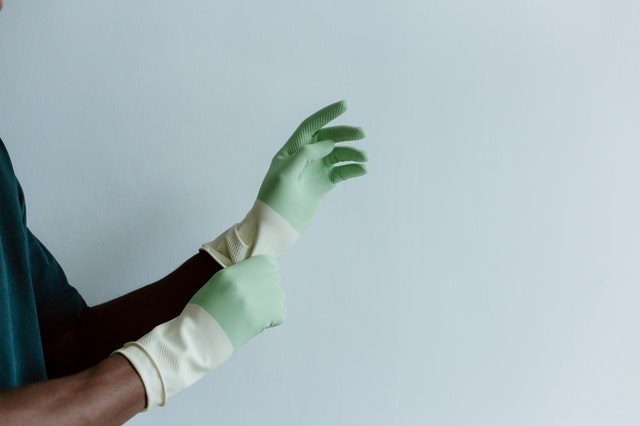
- With gloves on and a rag soaked in the penetrant rub the tool carefully. If the rust is on a cutting edge use extreme caution not to cut yourself. Get yourself a pair of knife cut resistant gloves just in case.
- If this does not remove all of the rust then you can try the next steps.
- Obtain baking soda, warm water, and a stiff bristle tooth brush.
- Combine warm water and baking soda to make a paste.
- Apply to the rusted area and scrub with the toothbrush.
- Continue to scrub until the rust has been removed.
- When compelted make sure to oil your tool to add back a protective layer.
Expert Multi-tool Care Final Thoughts
You should now have a fairly good overview of the things that you need to do to keep your multi-tool functional for years to come. It may even become a tool that you can hand down from generation to generation. If you are looking to do something like this make sure that you keep that tool dry. Clean it on a frequent basis and you will have a reliable friend at your side right when you need it. As I stated before, an ounce of preservation is worth a pound of care. So do a little bit of extra work upfront and you won’t have to do the harder work to remove rust. Trust me there is a little human that is going to feel the full weight of responsibility and ownership when you pass down that knife or tool to them. So give them something to be proud of when they show it to their friends.