
When you are out camping or hiking it is good to have a meal that is quick and easy. The humble sandwich meets this requirement. In fact as one of the most established lunchtime meals you should be right at home making one. The sandwich in its most basic form is simply two pieces of bread with some filling in the middle. They can range from meat and cheeses to peanut butter and jelly. You will find sandwiches in every shape and size as well as both hot and cold. Having a warm sandwich, especially in the wintertime, will make lunch something special. So it is time to start making sandwich iron cooking a part of your repertoire!
You may say though that you don’t just want some boring sandwich for lunch, even if it is hot. Panini connoisseurs know that a pressed sandwich is something that is a little more special than your normal ham and swiss. When camping lunch doesn’t have to be boring. In fact, you don’t have to make a big production out of making lunch just to have something out of the ordinary. There is a tool that really takes camping sandwiches to the next level. The Sandwich Iron, or pie iron, has really set the standard for making sandwiches at the campsite fun! So start sandwich iron cooking on your next outdoor adventure and really wow your friends and family.
Make this Cuban Sandwich Pie your first pie iron delicacy.
What is a Sandwich Iron
There are many different names for toasted sandwiches when camping. You may hear them called hobo pies, pie irons, mountain pies, sandwich pies, or pudgy pies, but we can all agree they are scrumptious! All of these things have one thing in common. They all use the Sandwich or Pie Iron to give them their warm and melty results. So why is there so much talk of pies? Well, the fact is that the edges of the bread get crimped as it cooks resulting in a hand pie shape or empanada.
So what is a sandwich iron?
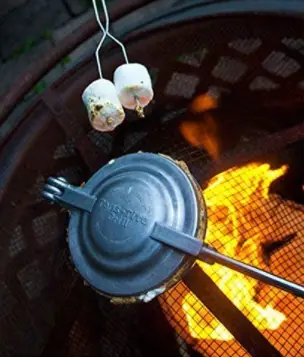
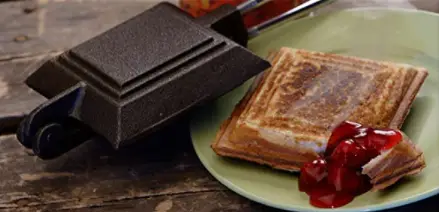
Well, it is a cooking instrument that uses two cast iron metal plates with a hinge and a handle. It is quite simple really. It takes the cast iron skillet and shrinks it down to sandwich or hand pie size for your sandwich iron cooking. From these mini skillets, you will also see a long handle attached to the sandwich iron which will give you space from the fire so that you can stay warm but not boiling hot. In general, you will find that this rod is fitted with a wooden or plastic handle. Some models will also come with a locking mechanism to allow you to hold thicker sandwiches together during cooking. It also helps with children who may inadvertently drop their sandwiches in the fire.


A sandwich iron may invoke thoughts of a waffle iron. In fact, you would be right to think of that as it acts in a similar fashion. Luckily for camping purposes though it does not have one of those pesky electrical cords. This means that you can strap it to your pack and head out into the wilderness and still enjoy a toasted sandwich. Knowing this they are typically used over an open fire or bed of coals. However, you can also pull out your camp stove in a pinch and heat any of your sandwiches up that way.
What is a Sandwich Iron Made from?
I mentioned that the sandwich iron is made out of cast iron. The cast iron version is similar to a cast-iron skillet and will gain seasoning over time. However, you will still need to grease it every use to prevent sticking. There are versions that are also made out of aluminum. This material is not as heavy as cast iron and may be better if you are taking your sandwich iron backpacking. However, you must be careful with aluminum as it is not as sturdy, can warp in extreme heat, and in my opinion will just not provide the same flavor as the cast iron. While you may have concerns with using aluminum. Nearly all of these versions will come with a non-stick coating for protection. See the comparison below.
| Cast Iron | Aluminum |
|---|---|
| A particular way to clean | Easy to clean and maintain |
| Transfers heat evenly and hold heat well | Good heat conductor and good heat distribution |
| Heavy | Lightweight |
| May rust if not taken care of correctly | Doesn’t rust |
| Safe Non-stick surface | Potential health effects |
| Sturdy and can take some hits | More fragile material that may warp |
| Good for base camping (car, RV, or developed sites) | Good for backpacking and dispersed camping |
Cast iron or aluminum recommendation
The clear recommendation and winner here is the cast iron sandwich iron. The flavor the cast iron will impart over time cannot be compared to the aluminum model. While I would recommend searching and purchasing a cast iron sandwich iron an aluminum one will last a long time as well. The aluminum one does have its place for reducing weight on long backpacking trips. With either material, you must make sure to handle them both carefully to extend their life.
There is more to camp cooking than sandwich irons. Check out these other recipes.
History of the Sandwich Iron
Toasted sandwiches have a long history around the world. In one form or another, the Australians and the South Africans have been carrying around a sandwich iron since the late 19th century. In the US, around the first world war, Charles Champion introduced the Tostwich. This tool is essentially the same as what we see today. However, other variations like the Jaffle Iron, by Earnest Smithers, have been introduced. As time went on the sandwich iron became more popular with campers. In the mid 20th century campers started using tonka toasters to merge white bread and pie fillings together while camping.
As stated, many versions of the sandwich iron have existed providing different designs and crimping faces. There was a resurgence in the desire to have hot-pressed sandwiches in the early 2000s. In response to this manufacturers brought the sandwich iron into our homes with the panini press. This electric convenience gave the user a taste of the toasty sandwich iron right on their counter. However, outdoor enthusiasts know the best tasting Sandwich pie comes from sandwich iron cooking over a fire.
What you Need for Sandwich Iron Cooking
There is really not much that you need in order to start sandwich iron cooking. In fact, with five simple items, you can get on your way to make delicious breakfasts, lunches, dinners, and desserts! Aside from the sandwich iron, it is likely that you are going to have all of these items already. So investing in a sandwich iron will give you many enjoyable meals for all of your future camping trips.
- A campfire or campstove
- A sandwich iron
- Sliced bread – be creative and use different types of breads for different sandwiches
- Non-stick spray or butter
- Filling of your choice (see some meal time and dessert examples below)
How to use a Sandwich Iron
With only five real things needed to start sandwich cooking, you are likely not surprised to know that they are easy to use. In fact, your kids will have a blast because this is the type of cooking that even the youngsters can get involved with. Think, it is just like roasting marshmallows but you get a whole meal!
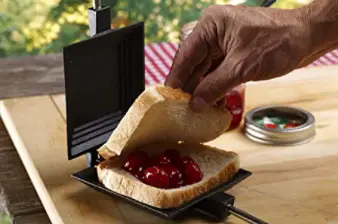
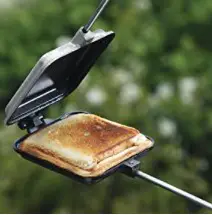
To start your sandwich iron cooking you will need to grease your iron. Preheat your sandwich iron in the fire. Feel free to coat your iron with oil, butter, plant butter, or lard. Applying butter to the outside of the bread will help your sandwich brown nicely and give it that crunch we are looking for. Similar to a grilled cheese you will want to assemble your sandwich with the fillings of your desire. Make sure that your buttered side is out! You will place the assembled sandwich into the toast and squeeze the two plates together. If your model has a lock you should go ahead and lock it to make sure you have tight crimps on your bread.
Now comes the fun part. Just like roasting marshmallows set that sandwich iron in the fire and let the sizzling begin! Remember here that if you are using an aluminum model you want to avoid the direct intense heat. This will cause warping of the iron and you will not have a happy sandwich. Make sure to rotate the pie iron so that heat is applied to both sides. This will provide the golden, crunchy, goodness on both sides will ensure proper melting of the sandwich ingredients. Check your sandwich pie as you go to prevent burning. It is okay to open the iron periodically to check the status.
Remember Safety first
A quick safety reminder, especially with children, handling sandwich irons can be dangerous because of how hot they get. Make sure that you are only using the grips provided and oven mitts when opening and closing the iron. Make sure to practice good fireside safety as well.
Make it multi-functional
The sandwich iron can be a multi-functional tool. Most units can be split into two separate items and can be used as skillets. We all want a multi-purpose camping tool!
Step by Step Sandwich Iron Pie
- Spray both sides of the iron with a non-stick spray.
- Lay a piece of bread on one side, spread on your favorite fillings, put another slice of bread on top, tightly close the iron, trim off excess bread if necessary, and toast it over the fire.
- Rotate the iron every minute or so until everything is melted evenly, and the bread is golden brown (about 4 minutes).
As you sit around the fire eating your pie iron goodies tell some of these great campfire stories.
Filling Combinations to Try
Main Courses
- Mozzarella Cheese and Pepperoni
- Spinach, bacon, feta, mushrooms, and onion
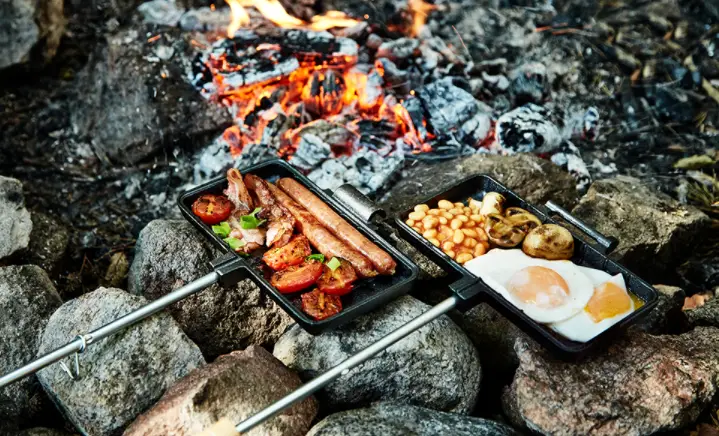
- Sausage, scrambled egg, and cheddar cheese
- Avocado, scrambled egg, bacon, and tomato
- French toast and ham
- Ham and cheese
- Tuna Salad and Cheddar Cheese
- Butter, garlic, parsely, salt
- Sliced hot dogs, cheese condiments

Dessert
- Banana and Nutella
- Marshmallows and Nutella
- Strawberries and Nutella
- Peanut Butter and Jelly
- Honey and Peanut butter
- Apples and Cinnamon Sugar
- Apple Butter and Fruit
- Any canned pie filling
If you are looking for a tasty sandwich that will use some leftovers try our Cuban Sandwich Pie!
Tell us what sandwich pie you are going to use your sandwich iron first after you make it in the comments below, on our Facebook Page, or join us over on Reddit to continue the conversation!!